‏إظهار الرسائل ذات التسميات CSS. إظهار كافة الرسائل

Objective Questions on CSS Syntax and Property set-6


1) ....... media type is used for use with printed material and documents viewed onscreen in print preview mode.

A. Print

B. Projection

C. Aural

D. Screen


2) In CSS length measurement unit ....... defines a measurement in picas.

A. pi

B. pc

C. pt

D. px


3) In CSS length measurement unit ......defines a measurement in screen pixel.

A. pi

B. pc

C. pt

D. px


4) ........ defines a measurement relative to a font's x-height. The x-height is determined by the height of the font's lowercase letter x.

A. cm

B. em

C. ex

D. hx


5) Which of the following is the correct CSS code to set the background color of all h1, h2 and h3 elements to orange.

A. h1.h2.h3{background-color:orange;}

B. h1, h2, h3{background-color:orange;}

C. h1 h2 h3{background-color:orange;}

D. h1, h2, h3{set-background:orange;}


6) The CSS selector E>F selects ...

A. direct decedents

B. adjacent siblings

C. preceding siblings

D. all elements


7) The CSS selector E-F selects .....

A. direct decedents

B. adjacent siblings

C. preceding siblings

D. all elements


8) ........... selects all elements of E that have an attribute attr that starts with the value given in a list of hyphen-separated values.

A. E[attr-=value]

B. E[attr|=value]

C. E[attr~=value]

D. E[attr^=value]


9) .......... selects all elements of E that have the attribute attr that begins with the given value.

A. E[attr-=value]

B. E[attr|=value]

C. E[attr~=value]

D. E[attr^=value]


10) A single @charset rule can be used in a/an ........... to define character set encoding of the style rules and values.

A. external sheet

B. internal sheet

C. inline codes

D. Both A and B


11) An ......... rule can be used to define style rules for multiple media types in a single embedded style sheet.

A. @embedded

B. @media

C. @page

D. @multiple


12) An ........... rule is used to define a page block for printed styles. Generally, within this construct we see various CSS properties like size, page, and margin to control the dimensions of the page.

A. @embedded

B. @media

C. @page

D. @print


13) Which of the following are the sub properties of background property used in CSS Except.

A. background-color

B. background-scroll

C. background-image

D. background-repeat


14) Which of the following is the default value of background-image property in CSS.

A. url

B. inherit

C. none

D. both A and B


15) State whether the following statements are True or False.

i) Background-position property determines how a background image is positioned within the canvas space by associated element.

ii) The default value for background-attachment property is fixed.

iii) The background image requires a URL(complete or relative) to link it to the source image specified with the url() syntax.

A. i-True, ii-True, iii-False

B. i-True, ii-False, iii-False

C. i-False, ii-True, iii-True

D. i-True, ii-False, iii-True


16) Which of the following is/are the sub properties of border property in CSS.

A. border-width

B. border-style

C. border-color

D. All of the above


17) Match the following CSS cursor resizing property with their descriptions.

i) e-resize a) pointing north south.

ii) ne-resize b) pointing northwest-southeast

iii) nw-resize c) pointing northeast-southwest

iv) n-resize d) pointing east-west(left-right)

A. i-d, ii-c, iii-b, iv-a

B. i-c, ii-b, iii-a, iv-d

C. i-b, ii-c, iii-d, iv-a

D. i-d, ii-a, iii-b, iv-c


18) ......... property controls how spaces, tabs, and newline charters are handled in an element.

A. visibility

B. white-space

C. tab-space

D. line-space


19) ......... property controls the algorithm used to lay out the table, cells, rows, and columns.

A. table-layout

B. cell-layout

C. row-column-layout

D. None of the above


20) ......... property is used to force or prohibit a printing page break within an element.

A. page-break-outside

B. page-break-inside

C. printing-page-break

D. page-break-element


Answers:

1) A. Print
2) B. pc
3) D. px
4) C. ex
5) B. h1, h2, h3{background-color:orange;}
6) A. direct decedents
7) C. preceding siblings
8) B. E[attr|=value]
9) D. E[attr^=value]
10) A. external sheet
11) B. @media
12) C. @page
13) B. background-scroll
14) C. none
15) D. i-True, ii-False, iii-True
16) D. All of the above
17) A. i-d, ii-c, iii-b, iv-a
18) B. white-space
19) A. table-layout
20) B. page-break-inside
478f8ffac419307280ec7a8194f9ee837ed62daf3f47597227


Related Posts:

For more Multiple Choice Questions (MCQs): Click Here

How to create fade effect image slideshow using CSS


You can give fade effect animation for image slideshow using CSS. @keyframes 'at' rule and animation keyword in CSS can be used to make image slideshow with fade effect. With @keyframes 'at' rule, you can define the properties that will be animated in an animation rule and animation keyword to set all of the animation properties.


Here I have used different types of animation properties like animation-name, animation-duration, animation-timing-function and animation-iteration-count. Where animation-name specifies name of the animation, animation-duration specifies animation duration in second(s) or milisecond(ms), animation-timing-function specifies how the animation will play like ease, ease-in, ease-in-out, ease-out and linear and animation-iteration-count:number of times animation should play.

Simple fade effect image slideshow 

 
Here is a sample CSS code for creating simple fade effect image slideshow written for safari browser.

<style type="text/css">
@-webkit-keyframes fade{
from {opacity:.5;}
50% {opacity:1;}
to {opacity:.5;}
}
#anim1 {-webkit-animation-name:fade;-webkit-animation-duration:5s;
-webkit-animation-iteration-timing-function:linear;
position:relative;-webkit-animation-iteration-count:infinite;}
</style>

Here is a full HTML code along with required JavaScript code for creating simple fade effect image slideshow.

<head>
<title>CSS Animations</title>
<style type="text/css">
@-webkit-keyframes fade{
from {opacity:.5;}
50% {opacity:1;}
to {opacity:.5;}
}
@-moz-keyframes fade{
from {opacity:.5;}
50% {opacity:1;}
to {opacity:.5;}
}
@-o-keyframes fade{
from {opacity:.5;}
50% {opacity:1;}
to {opacity:.5;}
}
@-ms-keyframes fade{
from {opacity:.5;}
50% {opacity:1;}
to {opacity:.5;}
}
#anim1 {-webkit-animation-name:fade;-webkit-animation-duration:5s;
-webkit-animation-iteration-timing-function:linear;position:relative;
-webkit-animation-iteration-count:infinite;-moz-animation-name:fade;
-moz-animation-duration:5s;-moz-animation-iteration-timing-function:linear;
-moz-animation-iteration-count:infinite;-o-animation-name:fade;
-o-animation-duration:5s;-o-animation-iteration-timing-function:linear;
-o-animation-iteration-count:infinite;-ms-animation-name:fade;
-ms-animation-duration:5s;-ms-animation-iteration-timing-function:linear;
-ms-animation-iteration-count:infinite;}
</style>
<script language="JavaScript">
var i = 0;
var path = new Array();

// LIST OF IMAGES
path[0] = "image1.jpg";
path[1] = "image2.jpg";
path[2] = "image3.jpg";

function swapImage1()
{
document.slide.src = path[i];
if(i < path.length - 1) i++; else i = 0;
setTimeout("swapImage1()",5000);
}
window.onload=swapImage1;
</script>
</head>
<body>
<div id="anim1"><img height="400" name="slide" src="image_1.gif" width="600" />
</div>
</body>
</html>


In the above code prefixes -webkit-, -moz-, -o-, -ms- are used for browsers safari, firefox, opera and internet explorer respectively.

Here is a preview of image slideshow for the code above.


slide


Fade effect image slideshow with caption


You can add caption for this slideshow by adding following JavaScript codes within <script> tag.


// LIST OF CAPTİONS  

caption[0] = "Caption for the first image";

caption[1] = "Caption for the second image";

caption[2] = "Caption for the third image";

function swapImage(){

var el = document.getElementById("mydiv");

el.innerHTML=caption[i];

var img= document.getElementById("anim1");

img.src= image[i];

if(i <k ) { i++;}

else { i = 0; }


For details on adding caption on image slideshow visit the post: How To Create Simple Image Slideshow Using JavaScript ?


Fade effect image slideshow with caption and link


You can add caption for this slideshow by adding following JavaScript codes within <script> tag.


var link= new Array();   

link[0] = "http://www.siteforinfotech.com/";
link[1] = "http://www.siteforinfotech.com/p/tutorial.html";
link[2] = "http://www.siteforinfotech.com/p/mcqs.html";


function swapImage(){

var el = document.getElementById("mydiv");

el.innerHTML=caption[i];

var img= document.getElementById("anim1");

img.src= image[i];

var a = document.getElementById("link");
a.href= link[i];

if(i <k ) { i++;}

else { i = 0; }


For details on adding caption and link on image slideshow visit the post: How to Create JavaScript Image Slideshow with Links


Related Posts:

How to make rounded corners border using CSS


While designing website, website template or blog template, you may want to make buttons, menus, paragraphs or any others border corners rounded to make your template more beautiful and attractive. It is possible by using a keyword "border-radius" in CSS. The keyword border-radius is used to make all the corners rounded by specifying the radius of corner. For example you can use the following CSS code.
rounded corners border using CSS

border-radius:10px;                    // makes radius of all the corners 10px;

You can also specify the radius for each corners by using border-radius-top-right, border-radius-top-left, border-radius-bottom-right, border-radius-bottom-left keywords. For example you can use the following CSS code to make each corner rounded.

border-radius-top-right:10px;
border-radius-top-left:10px;
border-radius-bottom-right:5px;
border-radius-bottom-left:5px;

The above code makes radius of left and right corners of top side 10px and radius of left and right corners of bottom side 5px.

To makes this CSS code browser specific or specific browser compatible, you have to use the prefix codes like -moz- for mozilla firefox and -webkit- for chrome or safari.


.all{

border:2px solid red;

-moz-border-radius:10px;

-webkit-border-radius:10px;

border-radius:10px;

width:250px;

}

.topleft{

border:2px solid red;

-moz-border-top-left-radius:10px;

-webkit-border-top-left-radius:10px;

border-top-left-radius:10px;

width:250px;

}

.topright{

border:2px solid red;

-moz-border-top-right-radius:10px;

-webkit-border-top-right-radius:10px;

border-top-right-radius:10px;

width:250px;

}

.bottomleft{

border:2px solid red;

-moz-border-bottom-left-radius:10px;

-webkit-border-top-left-radius:10px;

border-bottom-left-radius:10px;

width:250px;

}

.bottomright{

border:2px solid red;

-moz-border-bottom-right-radius:10px;

-webkit-border-bottom-right-radius:10px;

border-bottom-right-radius:10px;

width:250px;

}


Use above CSS code with the following HTML code given.

<html>
<head>
<title>CSS code for rounded corners</title>
<style type="text/css">

//place the abobe CSS code

</style>
</head>
<body>
<div class="all">All rounded corners</div>
</br>
<div class="topleft">Topleft rounded corner</div>
<br/>
<div class="topright">Topright rounded corner</div>
</br>
<div class="bottomleft">Bottomleft rounded corner</div>
<br/>
<div class="bottomright">Bottomright rounded corner</div>
</body>
</html>

You can view the following rounded corners for 2px solid red border and 250px width having 10px radius of corners.


All rounded corners

Topleft rounded corner

Topright rounded corner

Bottomleft rounded corner

Bottomright rounded corner


Here I have used <div> tag, so these shapes are appeared with line break. If you wanted to place these shapes on the same line you can use <span> tag. You can also use <p> tag with the place of <div> tag.

You can apply these rounded corners shapes to make CSS buttons, menus etc. Here is a sample code to make CSS button along with background color.

<div style="border:2px solid light-blue; -moz-border-radius:10px;
background-color:blue; z-index:10;-webkit-border-radius:10px;
border-radius:10px;width:110px;text-align:center;
color:white;cursor:pointer;">
CSS button
</div>


Related Posts:


How to Create Responsive Website or Blogger Template


As the time goes, browsing websites from desktop computers decreasing and using Laptops, Tablets and Mobile devices increasing day by day. So why not to create our website design custom for each types of devices, that fits and looks more attractive for those devices to acquire the visitors entered from those devices.

Responsive web design is the approach that suggests in which design and development should respond user behavior and environment based on the size of the browser screen, platform and orientation.

Responsive web design includes the use of flexible layouts, images and intelligent use of media queries. You can make your blogger template responsive by using special tags in CSS. Media queries (@media) are such tags, which helps to make your CSS for every device screen size. You can make many media queries on CSS that matches for each screen size and you can put custom CSS codes for each media queries.

Here I have explained some steps for creating your blog responsive.


Step1: Add meta tags for responsiveness


Add the following meta tags on your blogger template using the following steps.
  1.  Go to blogger dashboard and click on template
  2. Backup your template for the risk while editing template codes.
  3. Paste the following codes between and <head> and </head> tags.
  4. Save your blogger template.
For website also, paste the following codes between <head> and </head> tags.

Add the following codes to size the contents of blog equal to the device width.

  <meta name="viewport" content="width=device-width/">

Add the following codes to size the contents of blog equal to the device width and device height.

  <meta name="viewport" content="width=device-width, height=device-height/">

Add the following codes to size the contents of blog equal to the device width and initial zoom size.

  <meta name="viewport" content="width=device-width, initial-scale=2"/>

Add the following codes to size the contents of blog equal to the device width, initial zoom size and maximum zoom size.

  <meta name="viewport" content="width=device-width, initial-scale=1, maximum-scale=1/">

Instead or writing meta tags, you can do the same with the following codes in CSS.

@-moz-viewport {
                           width: device-width;
}

@-moz-viewport {
                           width: device-width;
                           height:device-height;
}

@-moz-viewport {
                           width: device-width;
                           initial-scale:2;
}

@-moz-viewport {
                           width: device-width;
                           initial-scale:1;
                           maximum-scale:1;
}


This works only for Mozilla browser, for other browsers you can use -o-, -webkit- and -ms- as prefixed properties.


Step2:Add media queries for each screen size


Add the following media queries  between <![CDATA[*/ and ]]> tags.


@media screen and (max-width:320px){
/*For Small Screen Moblies*/
}

@media screen and (max-width:480px){
/*For Smart Phones and iPhones*/
}

@media screen and (max-width:768px){
/*For Small Tables*/
}

@media screen and (max-width:1024px){
/*For Notebooks*/
}

You can add more media queries according to your need for different screen sizes and orientations and can also use min-width: to specify minimum width of screen.

To specify the screen orientations landscape or portrait use

@media screen and (max-width:480px) and (orientation:landscape) {  }


Step3: Write custom CSS code for media queries


Now, you have to add custom CSS codes for each media queries. The default CSS properties written are replaced by the properties written within these media queries. Here is the sample CSS code written for mobile devices, you can add these codes for media screen with max-width 320 and 480 px.

#wrapper {
  width:85%;
 }
 

#content{
 
width:100%;
}
 

#sidebar-left{
 
width:100%;
clear:both;
}
 

#sidebar-right{
 
width: 100%;
clear:both;


Alternate method for adding CSS code with media queries


For the alternate method, you can write media queries with custom CSS codes on a single .css file and link it on header part of  your blog or website as below.

<link rel="stylesheet" media="screen" href="screen.css"/>

You have to give the full path for "screen.css", where the file is placed.

You can also link different style sheet files for different screen sizes as below.

<link rel="stylesheet" media="screen and (max-width:1280px)" href="large.css"/>

<link rel="stylesheet" media="screen and (max-width:480px)" href="small.css"/>


Related Posts:


    How to Create Simple Blogger Template Easily?


    To create successful blog, it needs to create blogger template more attractive and looks more professional. Even you can buy professional blogger template on the web, you may want to create blogger template by yourself for your blog. Creating a professional blogger template is more challenging task, but if you have some knowledge on HTML, XML, CSS and JavaScript, it is possible to create professional blogger template easily by yourself. In this series of tutorial, I am going to teach you basic to advanced steps to create blogger template. Today I am telling you "steps for creating a simple blogger template" with describing basic elements and along with its corresponding style sheet codes.


    Step1: Preparing demo blog for creating blogger template


    To test blogger template you have created, at first you need to set up a blogger blog and have to add some posts on the blog. To create a blog, go to blogger home page, log in using your Google user name and password and then click on create a blog link to get started. Write posts for a blog by clicking on create a new post button from the blogger dashboard.


    Step2: Creating basic elements for blogger template


    Open Notepad file write the codes according to the following format and save it as .xml extension.

    # Creating XML Part


    At first, add the following codes for  Document Type Deceleration(DTD) on XML part.

    <?xml version="1.0" encoding="UTF-8" ?>
    <!DOCTYPE html PUBLIC "-//W3C//DTD XHTML 1.0 Strict//EN" "http://www.w3.org/TR/xhtml1/DTD/xhtml1 -strict.dtd">
    <html expr:dir='data:blog.languageDirection' xmlns='http://www.w3.org/1999/xhtml' xmlns:b='http://www.google.com/2005/gml/b' xmlns:data='http://www.google.com/2005/gml/data' xmlns:expr='http://www.google.com/2005/gml/expr'>

    # Creating Header Part


    After that, add the following header elements like head and title of the blog.

    <head>
    <title>
    <b:if cond='data:blog.pageType == "index"'>
    <data:blog.pageTitle/>
    <b:else/>
    <b:if cond='data:blog.pageType != "error_page"'>
    <data:blog.pageName/> | <data:blog.title/>
    <b:else/>
    Page Not Found | <data:blog.title/>
    </b:if>
    </b:if>
    </title>
    </head>

    # Creating CSS Part


    Add custom css codes for your template in the following format. The css codes must be placed inside <![CDATA[*/ and ]]>
    tag.

    body{
    font:normal normal 14px Verdana,Geneva,sans-serif;
    color:#000;padding:0 40px 40px 40px;
    background:#fff;
    font-size:14px;
    }
    #outer-wrapper{
    CSS for outer-wrapper
    }
    #header-wrapper{
    CSS for header-wrapper
    }
    #titlewrapper{
    CSS for titlewrapper
    }
    #descriptionwrapper{
    CSS for descriptionwrapper
    }
    #menuwrapper{
    CSS for menuwrapper
    }
    #contentwrapper{
    CSS for contentwrapper
    }
    #mainwrapper{
    CSS for mainwrapper
    }

    # Creating a Menu 


    To create menu for a blog, add the code in the following format. Replace URL and name of the tabs. 

    <div id='menuwrapper'>
    <ul class='FirstLevel'>
    <li><a href='http://www.homepage.com/' target='_self'>Home
    </a></li>
    <li><a href='http://www.homepage.com/menu1.html' target='_self'>Menu1
    </a></li>
    <li><a href='http://www.homepage.com/menu2.html' target='_self'>Menu2
    </a></li>
    <li><a href='http://www.homepage.com/menu3.html' target='_self'>Menu3
    </a></li>
    </ul></div>

    # Creating blog content

    To add main blog content part, add these codes to create a widget named Blog1.

    <div id='outer-wrapper'>
    <div id='header-wrapper'>
    <b:section class='header' id='header' maxwidgets='1' showaddelement='no'>
    <b:widget id='HTML1' locked='true' title='Header' type='HTML'>
    </b:widget>
    </b:section>
    </div>
    <div id='content-wrapper'>
    <div id='main-wrapper'>
    <b:section class='main' id='main' showaddelement='no'>
    <b:widget id='Blog1' locked='true' title='Blog Posts' type='Blog'>
    </b:widget>
    </b:section>
    </div>
    </div>
    </div>


    Step3: Creating gadgets on sidebar and footer.


    To create sidebar and footer and to add widgets  for them add these code, which allows you to add widgets on sidebar and footer.

    <div id='sidebar-wrapper'>
    <b:section class='sidebar' id='sidebar' showaddelement='yes'>
    </b:section>
    </div>

    <div id='footer-wrapper'>
    <b:section class='footer' id='footer' showaddelement='yes'>
    </b:section>
    </div>


    Step4: Installing blogger template on required blog.


    After creating a code file on Notepad in XML format, test it on demo blog. To install prepared template, click on backup and restore button from template option on blogger dashboard. Click on download full template, the xml file will be downloaded. Then go to the required blog then go to Template  ›  Backup / Restore option and browse and upload that xml file. The template will be applied on your blog.


    Related Posts:


    How To Make Simple CSS Stylesheet for a Website ?


    CSS language is used to simplify the process of making web pages presentable. It handles the look and feel part of a web page. Not only it makes the web development process more fast and saves the time but also makes the page loading time more faster and easier for maintenance. So today's almost all of the websites are designed by using CSS. You can design and link the CSS file very easily to the web page. In this post I am telling you on "How To Make Simple CSS Style Sheet for a Website ?" by using very simple steps and ideas. I hope that after reading this post you will able to make simple design for your web page using CSS. The format of the HTML page will be as in the image on right side.

    Steps To Make Simple CSS Style Sheet for a Website


    1. At first create a HTML file by using any text editor like notepad. On the HTML file write the following code and save it on the ".html" format.

    <html>
    <head>
    <title>How To Make Simple CSS StyleSheet for a Website ?</title>
    <link rel="Stylesheet" type="text/css" href="style.css">
    </head>
    <body>
    <div id="wrapper">
    <div id="banner">
    <p>This is banner</p>
    </div>

    <div id="navigation">

    </div>

    <div id="content_area">
    <p> This is content area</p>

    </div>

    <div id="sidebar">
    <p> This is sidebar</p>
    </div>

    <div id="footer">
    <p> this is footer</p>

    </div>
    </div>
    </body>
    </html>


    Here I have used "id" selector for css, you can also use class selector as <div class="wrapper"> etc.

    2. Then create a CSS file by using any text editor like notepad. On the CSS file write the following code and save it on the ".css" extension format.


    #wrapper {
    width:1080px;
    margin:0 auto;
    padding:10px;
    border:5px solid #dedede;
    background-color:#fff;
    }

    #banner {
    height:150px;
    border:3px solid #e3e3e3;
    background-size:cover;
    background-image: url("banner.jpg");
    background-repeat: no-repeat;
    }

    #navigation {
    height:50px;
    border:3px solid #e3e3e3;
    margin-top:20px;
    width:auto;
    background-image: url("nav.jpg");

    }

    #content_area{
    float:left;
    width:755px;
    margin:20px 0 20px 0;
    padding:10px;
    border: 3px solid #e3e3e3;
    text-align:justify;
    }

    #sidebar {
    float:right;
    width:250px;
    height:388px;
    border:3px solid #e3e3e3;
    margin-top:26px;
    }

    #footer {
    clear:both;
    width:auto;
    height:40px;
    margin-top:20px;
    background-image: url("footer.jpg");
    border:3px solid #e3e3e3;
    text-align:center;
    color:#fff;
    }


    Replace the image url i.e. "banner.jpg" by your image path on the css code above.

    Replace the stylesheet name "style.css" by your saved stylesheet name on the HTML code above. The stylesheet file should be on the same folder or should give the full path.

    For "class" selector, you have to write the css code as the format .wrapper{ } etc.

    You can add the menu items on navigation by adding HTML codes and CSS codes on HTML and CSS files copying from the previous post: How To Create Simple Menu Using CSS ?

    You can add the contents on "content_area", "sidebar" and "footer" by using different HTML Tags like <p> </p> etc.


    Related Posts:

    How To Create Simple Menu Using CSS ?


    By using CSS codes we can create websites menus more easily with very simple and small number of codes. So uses of CSS menus on websites makes your website lighter and faster, also runs on almost all of the browsers. Here I have given some useful steps and codes for creating simple menu using CSS. It may help you to make simple, attractive and awesome menu for your own website by using the following steps and codes.


    To Create Simple Menu Using CSS


    # At first create the following HTML codes on your webpage.

    Replace the "#" with your link URL included in the HTML code below.

    <div id="navigation">
    <ul id="nav">
    <li><a href="#">Home</a></li>
    <li><a href="#">Item1</a>
    <ul>
    <li><a href="#">SubItem1</a></li>
    <li><a href="#">SubItem2</a></li>
    <li><a href="#">SubItem3</a></li>
    <li><a href="#">SubItem4</a></li>
    </ul>
    </li>

    <li><a href="#">Item2</a></li>
    <li><a href="#">Item3</a></li>
    </ul>
    </div>

    # Create a CSS file with the following codes.

    Replace the 'back.jpg' with your image file included in the css code below.

    #navigation{
    width:auto;
    height:30px;
    float:left;
    background-image: url('back.jpg');
    border:none;
    margin-top:20px;
    margin-left:0px;
    }

    #nav{
    list-style: none;
    padding:0px;
    display:block;
    margin-top:2px;

    }

    #nav li{
    font-size:20px;
    float:left;
    position:relative;
    width:180px;
    hight:50px;
    display:block;
    align:center;
    padding-left:10px;

    }

    #nav ul{
    list-style:none;
    margin:0;
    padding:0;
    width: auto;
    display:none;

    }

    #nav li:hover{
    background-image:url('back.jpg');
    background-repeat:no-repeat;
    background-size:cover;
    }

    #nav li:hover>ul{
    display:block;
    position:absolute;

    }


    #nav li ul{
    left:0px;
    margin-top:0px;
    padding-top:0px;
    }

    #nav li ul li{
    background-image:url('back.jpg');
    background-repeat:no-repeat;
    background-size:cover;
    border:1px solid #e3e3e3;
    padding-left:10px;
    width:178px;
    }


    #nav a:link, #nav a:active, #nav a:visited{
    display:block;
    color:#ff00aa;
    text-decoration:none;
    }


    # Link CSS file to the web page.

    Add the following code to link CSS file to the web page between <head> tags.

    <head>

    <link rel="Stylesheet" type="text/css" href="style.css">

    </head>

    Preview of  CSS Menu


    Related Posts:

    Solved Objective Questions of CSS set-4


    1. In CSS filters, ........................... will be used to create a shadow of object at the specified horizontal and vertical offset and color.

    A) Drop shadow effect

    B) Chroma filter

    C) Shadow object effect

    D) Shadow filter


    2. ............................. will be used to create attenuated shadow in the direction and color specified.
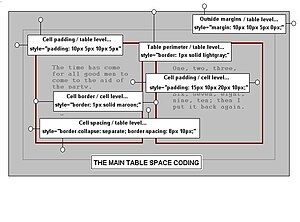
    English: graphic of the main CSS table spaces
    English: graphic of the main CSS table spaces (Photo credit: Wikipedia)

    A) Drop shadow effect

    B) Chroma filter

    C) Shadow object effect

    D) Shadow filter


    3. State whether the statements are true or false.

    i) Glow effect will be used to create a glow around the object.

    ii) The two parameters used in glow effect are color and intensity.

    iii) Invert effect will be used to create a negative image

    A) i-true, ii-true, iii-true

    B) i- true, ii-false, iii-true

    C) i-false, ii-true, iii-true

    D) i-false, ii-false, iii-true


    4. Which of the following are the parameters used in wave effect of CSS filter property?

    i) add        ii) freq          iii) light          iv) phase         v) intensity


    A) i, ii, iii and iv only

    B) i, ii, iii and v only

    C) i, ii, iv and v only

    D) All i, ii, iii, iv and v


    5. Match the different CSS media types with their descriptions.

    i) all a) Intended for speech synthesizers.

    ii) aural b) Intended primary for color computer screen.

    iii) screen c) Intended for paged braille printers.

    iv) embossed d) Suitable for all devices

    A) i-a, ii-b, iii-c, iv-d

    B) i-c, ii-d, iii-a, iv-b

    C) i-d, ii-a, iii-b, iv-c

    D) i-b, ii-c, iii-d, iv-a


    6. The ................... property allows you to specify the content for a <caption> element should be placed in relationship to the table.

    A) Caption

    B) Caption-side

    C) Caption-position

    D) Caption-align


    7. The ........................... property indicates whether a cell without any content should have a border displayed.

    A) empty-row

    B) empty-column

    C) empty-cell

    D) empty


    8. The ........................ property for HTML tables in CSS specifies whether the browser should control the appearance of adjacent borders that touch each other.

    A) border-spacing

    B) border-collapse

    C) caption-side

    D) table-layout


    9. The ................. property indicates whether the marker should appear inside or outside of the box containing the bullet points.

    A) list-style-align

    B) list-style-type

    C) list-style-position

    D) list-style-appearance


    10 . The overflow property of CSS can take one of the following values.

    i) visible                  ii) invisible              iii) hidden             iv) scroll           v) auto

    A) i, ii, iii and iv only

    B) i, iii, iv and v only

    C) i, ii, iv and v only

    D) All i, ii, iii, iv and v


    Answers:

    1.  A) Drop shadow effect
    2.  D) Shadow filter
    3.  B) i- true, ii-false, iii-true
    4.  A) i, ii, iii and iv only
    5.  C) i-d, ii-a, iii-b, iv-c
    6.  B) Caption-side
    7.  C) empty-cell
    8.  B) border-collapse
    9   C) list-style-position
    10  B) i, iii, iv and v only


    You Might also view the following Related Posts

    MCQ of CSS With Answer set-2

    MCQ of CSS With Answer
    English: css - absolute position (Photo credit: Wikipedia)

    1. Which of the following are the background properties in CSS?

    i) background-color ii) background-image iii) background-repeat

    iv) background-position v) background

    A) i, ii, iii and iv only

    B) i, ii, iii and v only

    C) i, ii, iv and v only

    D) All i, ii, iii, iv and v


    2. State whether the statement is/are True.

    i) font-family property is used to change the face of a font.

    ii) font-variant property is used to create small-caps effects.

    A) i-True, ii-False

    B) i-False, ii-True

    C) i-True, ii-True

    D) i-False, ii-False


    3. The CSS links properties are

    A) :link, :visited, :hover, :active

    B) :link, :visit, :hover, :active

    C) :link, :visited, :over, :active

    D) :link, :visited, :hover, :active, :inactive


    4. Internet Explorer uses ....................... property to create transparent images.

    A) -moz-opacity:x

    B) filter: alpha(opacity=x)

    C) Both of the above

    D) None of the above


    5. The different ways to associate styles with a HTML document is/are

    A) Embedded CSS with <style> element

    B) Inline CSS with style attribute.

    C) External CSS with <link> element.

    D) All of the above


    6. Which of the following is correct CSS syntex for using font property?

    A) <p style="font: italic, bold, 15px;"> ................ </p>

    B) <p style="font-style: italic font-weight: bold font-size: 15px;"> ................... </p>

    C) <p style="font: italic bold 15px;"> ....................... </p>

    D) None of the above


    7. State True of False for the CSS table properties.

    i) The border-spacing specifies the width that should appear between table rows.

    ii) The empty-cells specifies whether the border should be shown if a cell is empty.

    A) i-True, ii-False

    B) i-False, ii-True

    C) i-True, ii-True

    D) i-False, ii-False


    8. In CSS tables, the possible values for the caption-side property can have the following values.

    A) top, bottom, left or right

    B) top, bottom, center, left or right

    C) top or bottom

    D) left or right


    9. The ................... property indicates whether a cell without any content should have a border displayed.

    A) blank-cells

    B) empty-cells

    C) nocontent-cells

    D) noborder-cells


    10. The ..................... specifies whether a border should be solid, dashed line, doted line, double line, groove etc.

    A) border-layout

    B) border-decoration

    C) border-style

    D) border-weight

    Answers:

    1.  D) All i, ii, iii, iv and v
    2.  C) i-True, ii-True
    3.  A) :link, :visited, :hover, :active
    4.  B) filter: alpha(opacity=x)
    5.  D) All of  the above
    6.  C) <p style="font: italic bold 15px;"> ....................... </p>
    7.  B) i-False, ii-True
    8.  A) top, bottom, left or right
    9   B) empty-cells
    10 C) border-style


    You Might also view the following Related Posts

    فيديو الأسبوع